Belle Grâce – A La Gala

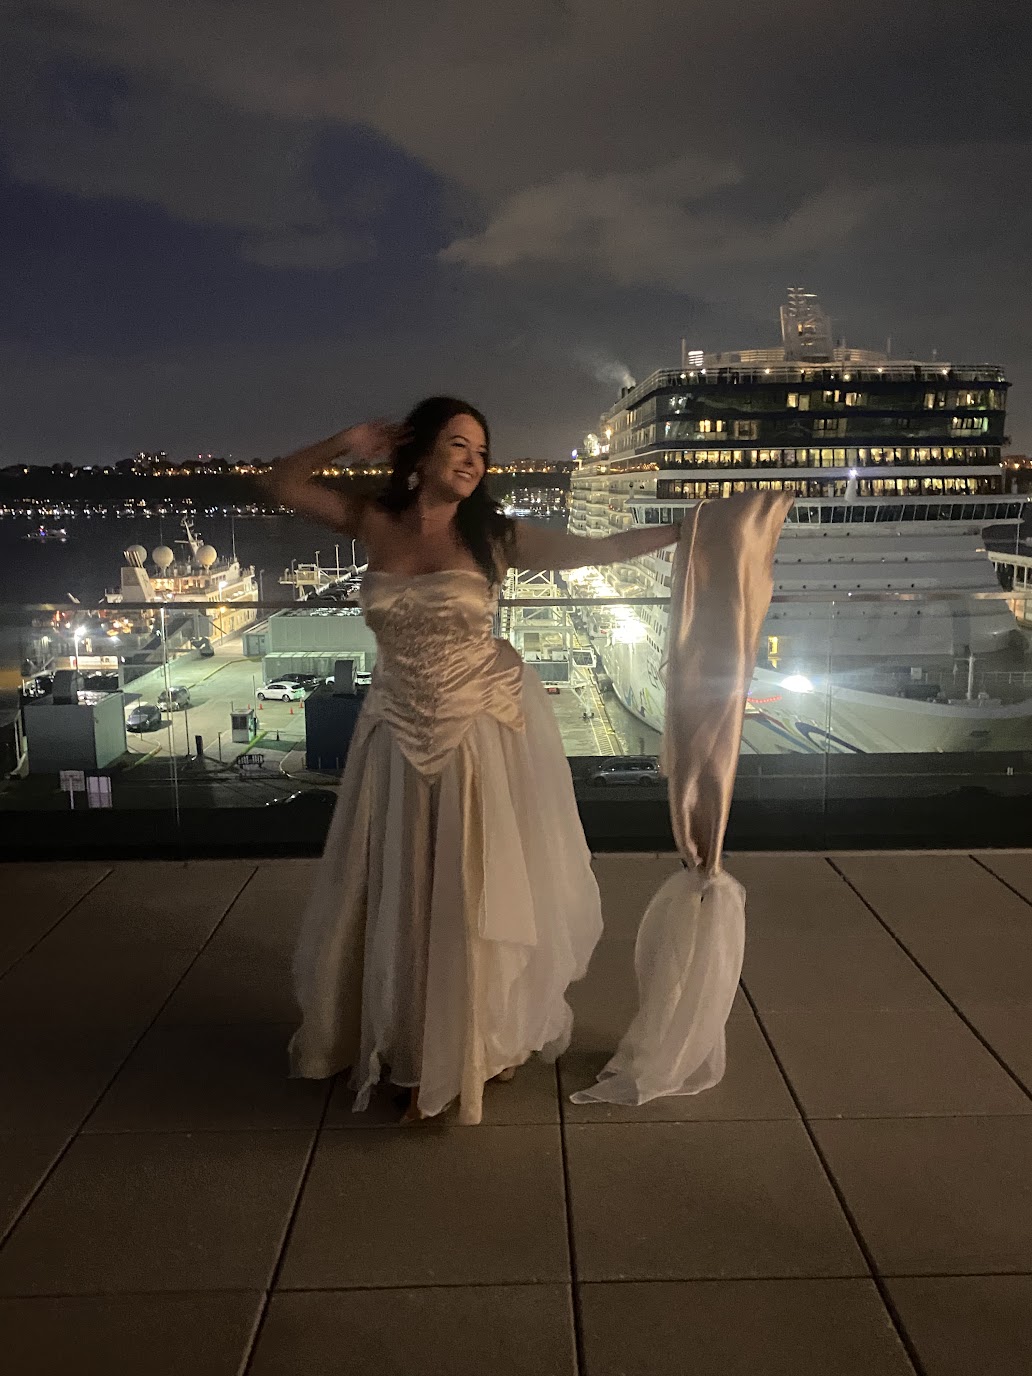
Robin needed a gown. It was time for ECAD, The Explorers Club Annual Dinner in New York City.

Robin emailed me via my website. She had been searching on line for an interesting gown source. The message read, “tell me more about your gowns”. Robin was enthralled by the fact they are made from: reused, repurposed, new old stock, etc. materials.

Included in the mail was her purpose, phone and other info which made it super easy to check her out. She was a valid contender to wear an Art Gown. After a personable phone conversation, we decided on Belle Grâce.

To review Belle Grâce, or see her for the first time click on her pic below.

 My judy is built for someone who is about 5’6″ & a size 6. Robin is 5’9″ and about a size 10. No worries! The Art Gowns are built in components: top, skirt, tail & often a bussell

First thing was to detach the tail. Who could walk and dance an entire evening in an Art Gowns tail?

Belle Grâce stands in a pool of handkerchief hem. The great thing about Robin’s height is the handkerchief hem was now enough off the ground that I merely had to tie overhand knots in the longest points.

This slideshow requires JavaScript.

We decided she would need to wear a strapless bra, so I designed a strap across the back to cover the bra’s back. A second thin strap was added for extra support.

By the time the beautiful and vivacious Robin returned for her second fitting, I had converted Belle Grâce’s tail into a stole. Skirt hooks and bussell snaps had been repositioned. Back straps had been built and positioned. Knots were tied in the handkerchief hem.

This slideshow requires JavaScript.

WHEN ROBIN PICKED UP THE GOWN I ONLY HAD TO PERFCT BAR PLACEMENTS IN THE BACK.
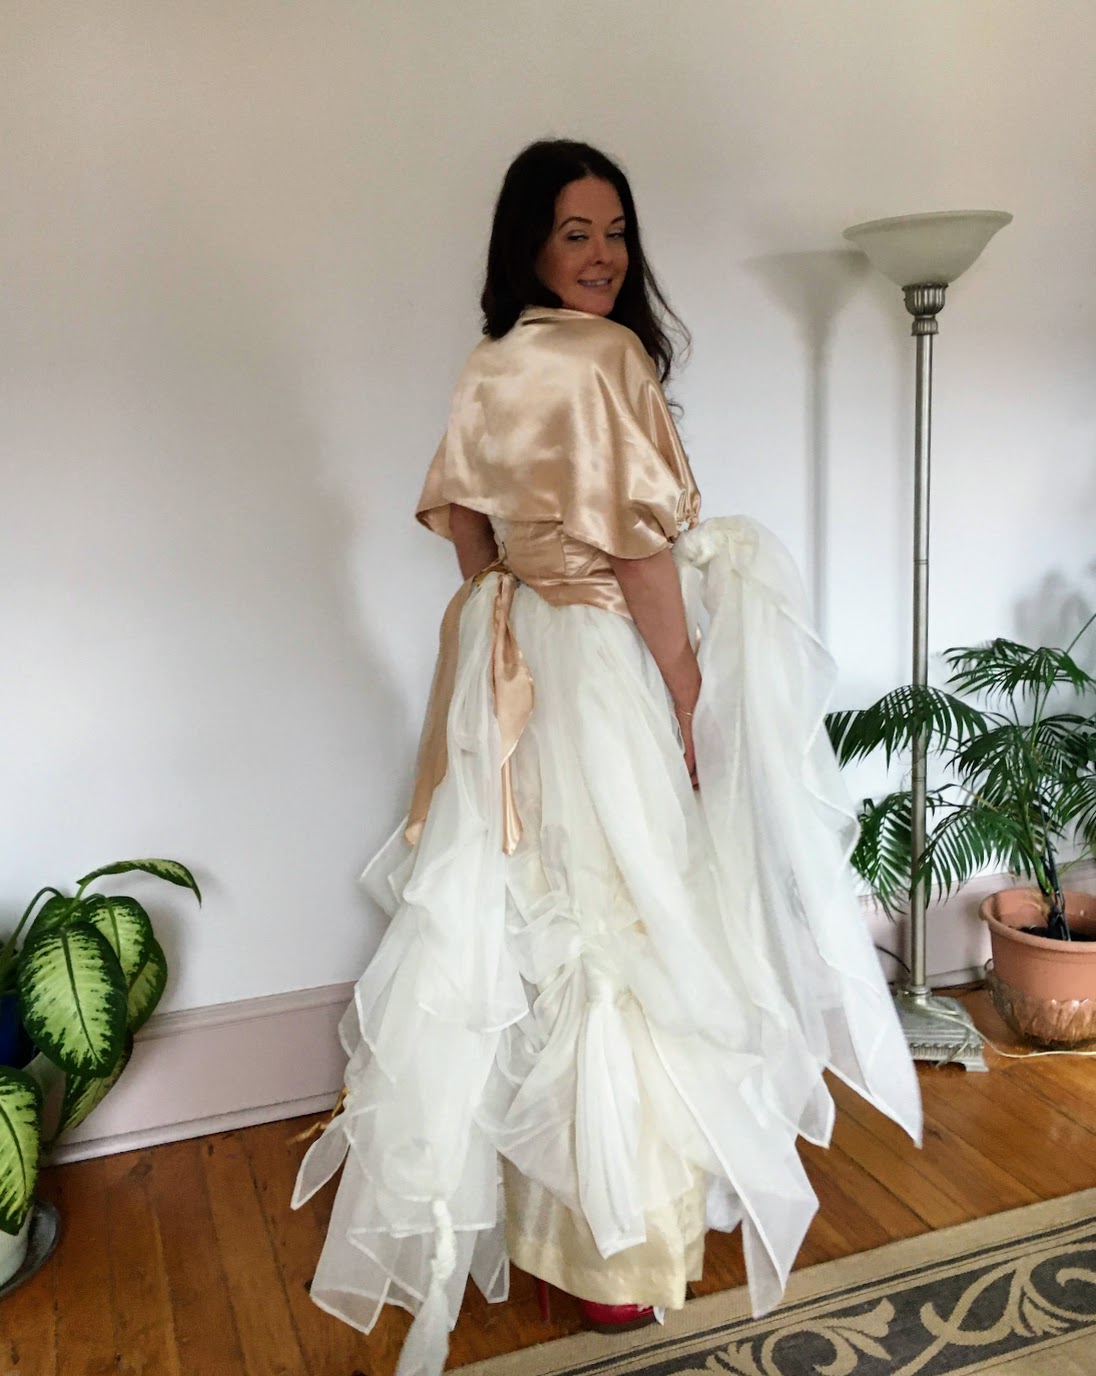
TADA!

Robin Brooks is an elected executive of the Canadian Chapter of The Explorers Club. She is the regional director for Ontario/Nunavit. Click on her pic below to view the page.

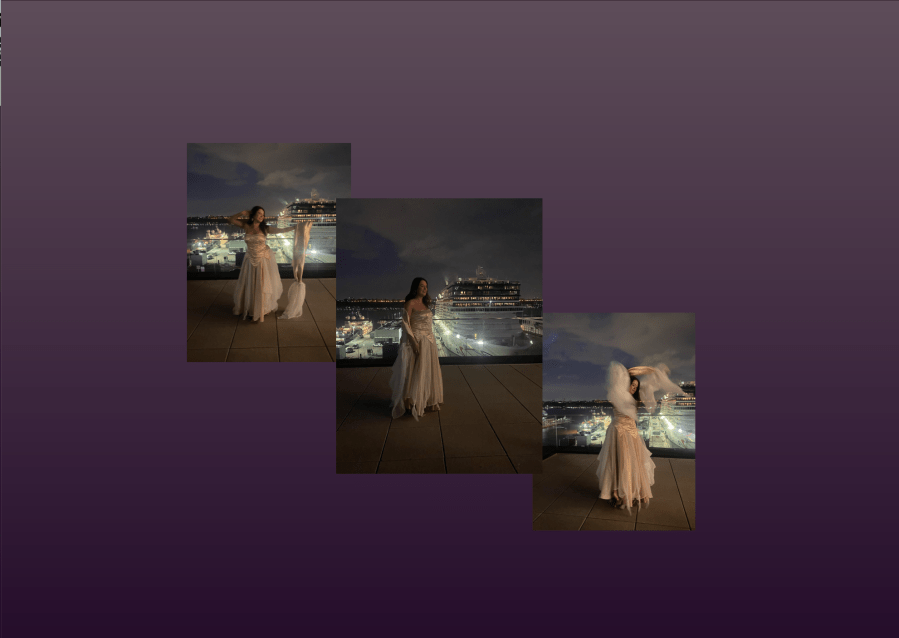
To check out The Explorers Club (established 1904) click on the pic below of Robin tripping the light fantastic.

Thank you, Robin! I am ecstatic.

Message in a Bracelet – DIY

Do you love learning about history? Does it ever inspire you?

B'let #1b2

Then think “Suffragettes” and you’ll know why I’ve designed a bracelet in green, white and violet.

Recently, I did a guest post on Christy Burmingham’s  blog WHEN WOMEN INSPIRE. It’s titled #GreenWhiteViolet. It inspired me back!

B'let #1e

I decided the bracelet needed earrings. I wound up making 2 pairs.

B'let #33

Just in case you want to make a bracelet of your own design:

DIY INSTRUCTIONS


B'let #3

One of my challenges was that I had to use what I could find at home, or in my kit.

I gathered my green, white and violet beads.I found white pony beads, violet lined glass seed beads, a string of real cut amethysts, and a string of fake pearls.

There were also some solid purple & green glass ponies and a string of agates, several in appropriate tones.

B'let #4

 I never did use the crystals that you see in my platter’s collection.

You’ll need a needle nose jewelry plier, and a flat nose plier w/cutter.

Find some great chain.

Gather jump rings,  jewelry pins to match the chain (or not to match, depending on your design) and a clasp.

B'let #5b

Now creatively thread the beads onto the jewelry pins.

Try to keep an eye on what your building beforehand by clustering up some beaded pins, and havng a look!

If you’re happy then you can begin attaching your lovelies onto the chain.

INTERMISSION

B'let #20

Now, on with the DIY instructions!

B'let #5Cut the chain about 3 inches longer than you need.

As you add beads, they and the pins take up space so it will get shorter and shorter.

You also need to snip the jewelry pins to about 1/2 inch from the top bead.

Using the needlenose pliers, bend the end of the pin into an arc.

Hook the arced pin into the chain. 

B'let #8

Again, using the needle noses, push the open end of the pin toward the piece of pin coming out of the bead.

Tuck the raw pin end inside the bead to finish it.

Keep attaching beaded pins.

Before the bracelet is fully clustered up, check how it’s fitting your wrist.

Add the clasp to one end. You may need to use a jump ring here.

If your chain is not open enough forB'let #8

your clasp to fit through, you will need to add a  jump ring to the appropriate place  at the other end.

If needed snip off excess chain.

TIP: Hold the beaded pin with the flat nose pliers in one hand, while you work with the needle nose in your other.

Click on pics for larger details.

TO MAKE EARRINGS

You will need a pair of  “shepherd’s hooks” or a pair of clips.
B'letearring #1

B'letearring #2

Use all of the same beads and findings. 

Using the same techniques as for the bracelet, design and build your earrings.

Unless they are symmetrical, remember to make a left and a right.

 Slideshows are visual poetry. Here is my prose. However, if you feel like reading a written poem, check out Christy Birmingham’s blog Poetic Parfait

This slideshow requires JavaScript.

The past can be a nostalgic allure.

B'letbyebye

Until my next post, I wish you all a fond and romantic adieu!
B'letPS #1B'letPS#2