
Do you love learning about history? Does it ever inspire you?

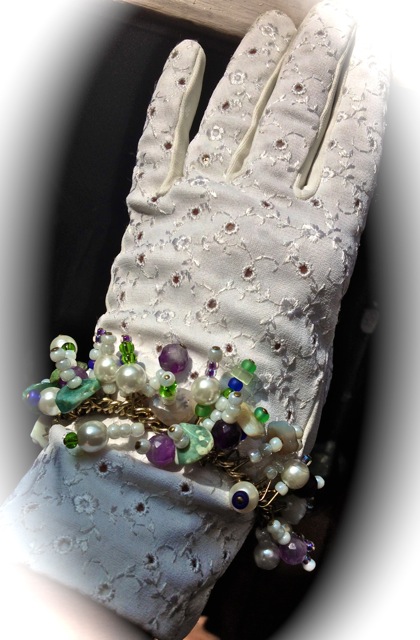
Then think “Suffragettes” and you’ll know why I’ve designed a bracelet in green, white and violet.
Recently, I did a guest post on Christy Burmingham’s blog WHEN WOMEN INSPIRE. It’s titled #GreenWhiteViolet. It inspired me back!

I decided the bracelet needed earrings. I wound up making 2 pairs.

Just in case you want to make a bracelet of your own design:
DIY INSTRUCTIONS

One of my challenges was that I had to use what I could find at home, or in my kit.
I gathered my green, white and violet beads.I found white pony beads, violet lined glass seed beads, a string of real cut amethysts, and a string of fake pearls.
There were also some solid purple & green glass ponies and a string of agates, several in appropriate tones.

I never did use the crystals that you see in my platter’s collection.
You’ll need a needle nose jewelry plier, and a flat nose plier w/cutter.
Find some great chain.
Gather jump rings, jewelry pins to match the chain (or not to match, depending on your design) and a clasp.

Now creatively thread the beads onto the jewelry pins.
Try to keep an eye on what your building beforehand by clustering up some beaded pins, and havng a look!
If you’re happy then you can begin attaching your lovelies onto the chain.
INTERMISSION

Now, on with the DIY instructions!
 Cut the chain about 3 inches longer than you need.
As you add beads, they and the pins take up space so it will get shorter and shorter.
You also need to snip the jewelry pins to about 1/2 inch from the top bead.
Using the needlenose pliers, bend the end of the pin into an arc.
Hook the arced pin into the chain.
Again, using the needle noses, push the open end of the pin toward the piece of pin coming out of the bead.
Tuck the raw pin end inside the bead to finish it.
Keep attaching beaded pins.
Before the bracelet is fully clustered up, check how it’s fitting your wrist.
Add the clasp to one end. You may need to use a jump ring here.
If your chain is not open enough for
your clasp to fit through, you will need to add a jump ring to the appropriate place at the other end.
If needed snip off excess chain.
TIP: Hold the beaded pin with the flat nose pliers in one hand, while you work with the needle nose in your other.
Click on pics for larger details.
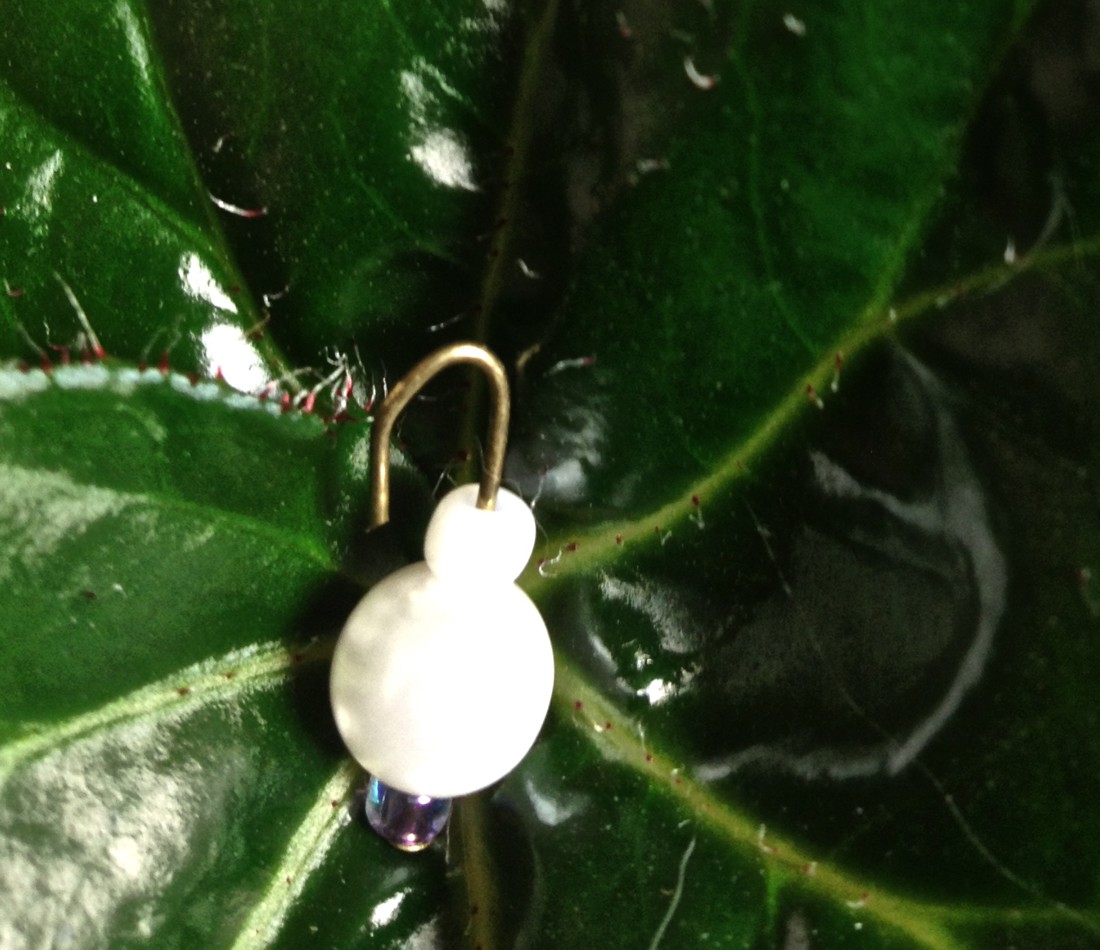
TO MAKE EARRINGS
You will need a pair of “shepherd’s hooks” or a pair of clips.


Use all of the same beads and findings.
Using the same techniques as for the bracelet, design and build your earrings.
Unless they are symmetrical, remember to make a left and a right.
Slideshows are visual poetry. Here is my prose. However, if you feel like reading a written poem, check out Christy Birmingham’s blog Poetic Parfait
The past can be a nostalgic allure.
Until my next post, I wish you all a fond and romantic adieu!


You must be logged in to post a comment.